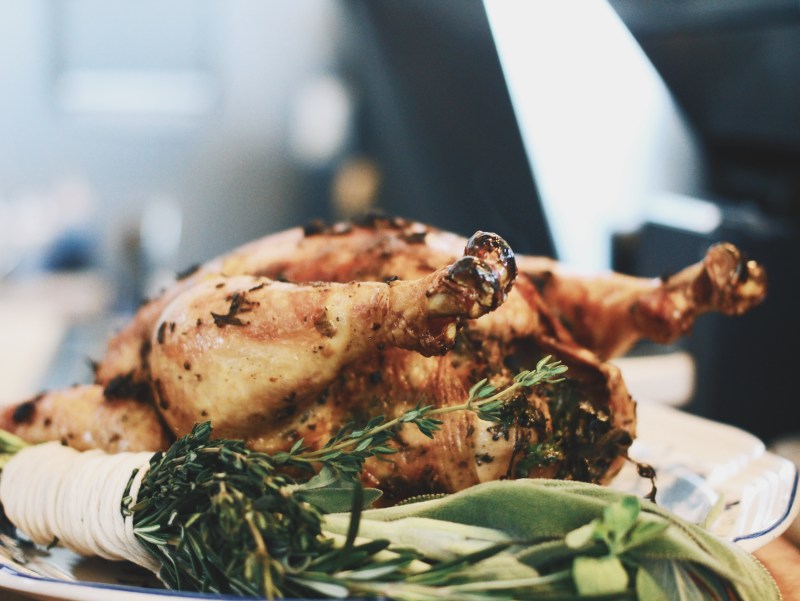
An expertly roasted chicken, with its juicy meat and crispy skin, has a tendency to remind you of your childhood. Remember those days? No real responsibility, energy of a baby jackrabbit, sneaking sips from dad’s glass of bourbon, and mom’s home-cooked Sunday dinners of roasted chicken with buttery mashed potatoes and gravy. They call it “comfort food” for a reason, and a roasted chicken is definitely one of those foods. Seemingly simple on paper, roasting a chicken the right way does require some proper planning and know-how to ensure your roasted bird comes out the same as if it were cooked by a professional chef.
We’re going to outline every step of the process to make sure your roasted chicken is the best it can be, from what to look for when buying your bird, to the differences between wet and dry brining, to roasting. It may seem like a long process, but the effort is rewarded in the end with what will be the best-roasted chicken you’ve (probably) ever had.
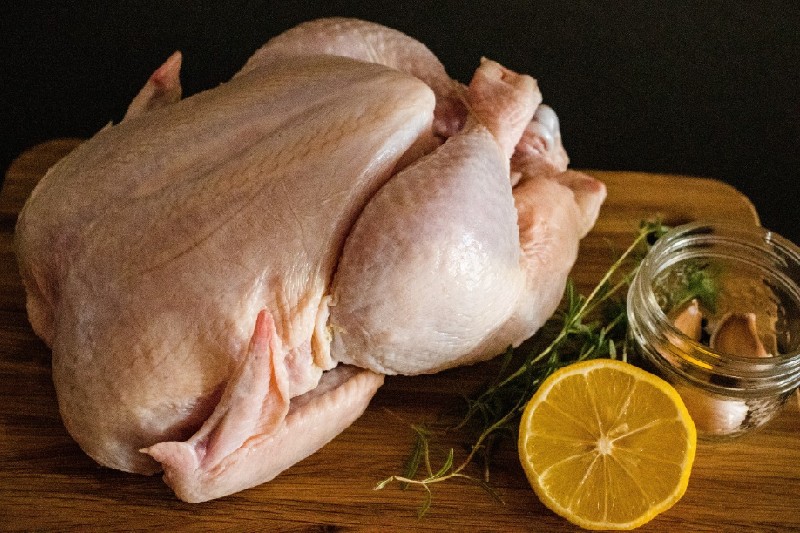
Buying Your Bird
When shopping for a chicken to roast at home, it is always in your best interest to buy from a local butcher. Spend the most that your budget allows since the better the quality of the chicken, the better the flavor when all is said and done. Top-quality chickens will have a yellowish tint to the skin, firm pink flesh, and no visible bruising or tears in the skin. Fresh, high-quality birds will be firm to the touch and spring back after a couple of seconds. If you press into the flesh and it’s soft and mushy, this is a sign that the chicken has been frozen and thawed or hasn’t been handled properly. Look for “air-chilled” as another sign of a top-notch bird. Being “air-chilled” after being processed instead of being dumped into an ice bath means the chicken will have less retained water than a mass-produced bird does.
To Recap:
- Look for a yellow tint to the skin and light pink flesh
- No visible bruises or tears
- Firm to the touch with no off odors
- Dry, air-chilled birds are best
Wet Brine vs. Dry Brine
Normally we hear about brining every year around Thanksgiving, but brining isn’t just for turkey during the holidays. Unless you’re braising something, moisture is the enemy when roasting meat, so here at The Manual we prefer the dry-brine method as opposed to a wet brine. Dry-brining is simply the process of salting and resting meat before cooking it, and it achieves the same results as a wet brine (deeply seasoned, juicy meat) without the addition of extra water retention from being submerged in a salt-water brine.
The biggest problem with wet brine is introducing extra water into the meat, which results in a lack of flavor in the finished product. While it may look and smell pretty to have lemons, herbs, and garlic in your brine, none of those flavors actually make it into the food. By utilizing the dry-brine method instead of adding water (diluting flavor), you are reducing the water content (concentrating flavor) while also drying out the skin, which will produce a crispier skin! To dry-brine your bird, simply dust it in kosher salt (and herbs, if you’re fancy) and let it rest overnight on a wire rack in your fridge.
To Recap Why You Should Dry-Brine:
- It’s easy to do
- Deeply and evenly seasoned food
- Concentrated flavor
- Juicy meat
- Super-crispy skin
Time To Roast
Now that you’ve dry-brined your bird overnight, it’s time to roast it. Don’t worry about rinsing the chicken after the brine because you’ll just negate all the good work that you’ve done so far. Take the chicken out of the fridge and let it temper on the counter for a couple of hours before you plan to move it to the oven. At this point, go ahead and fill the cavity with aromatics to get it ready for the oven — fresh thyme and oregano, smashed garlic cloves and some lemon slices. Next up, you’ll want to truss the chicken so that it cooks more evenly. Your goal here is tie the legs up close to the breasts to make the bird more plump and dense.
Cooking temps will vary depending on who you ask. Some say to blast the bird at a high temp the whole time; some say to start high and finish low, while some say the opposite. Since oven temperatures can vary wildly, we always suggest starting low and finishing high. So, start by roasting the chicken in a pre-heated 375 F oven for 30-35 minutes. Rotate the pan and increase the temperature to 450 F and finish cooking for another 20-30 minutes or until a thermometer inserted into the thigh joint reads 165 F.
To Recap:
- Don’t rinse the chicken after the dry-brine
- Stuff the cavity with aromatics like fresh herbs, lemon, and garlic
- Truss to ensure even cooking
- Roast, on a rack, starting at 375 F for 30-35 minutes
- Finish cooking at 450 F for 20-30 minutes or until an internal temperature reaches 165 F
Time To Eat
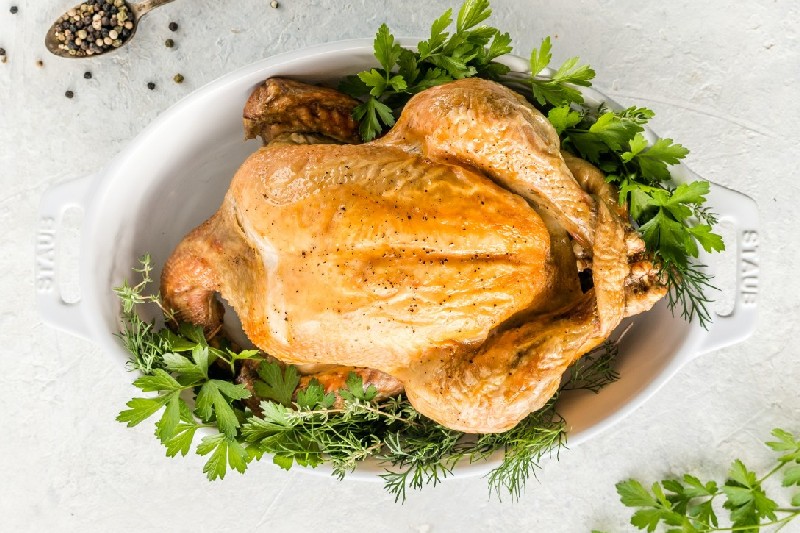
When your chicken is done roasting, remove it from the oven and let it rest for 20 minutes. Use this time to prepare your sides or a quick pan jus using the drippings. After the chicken has rested, it’s time to carve. Move the bird to a cutting board and turn it upside down to cut out the two “oysters.” These are the little hidden gems of glorious, fatty dark meat meant to be enjoyed by the cook. Pop ’em out, hit them with a sprinkle of sea salt, and have a snack for a job well done.
Turn the chicken back over, breasts up, and cut off the leg and thigh on both sides. Cut off the wings and separate the thigh from the leg by cutting along the visible fat line on the thigh. Slice down the breast bone and separate the breasts. Dig out any leftover meat with spoon and reserve the carcass for making stock.
Stock
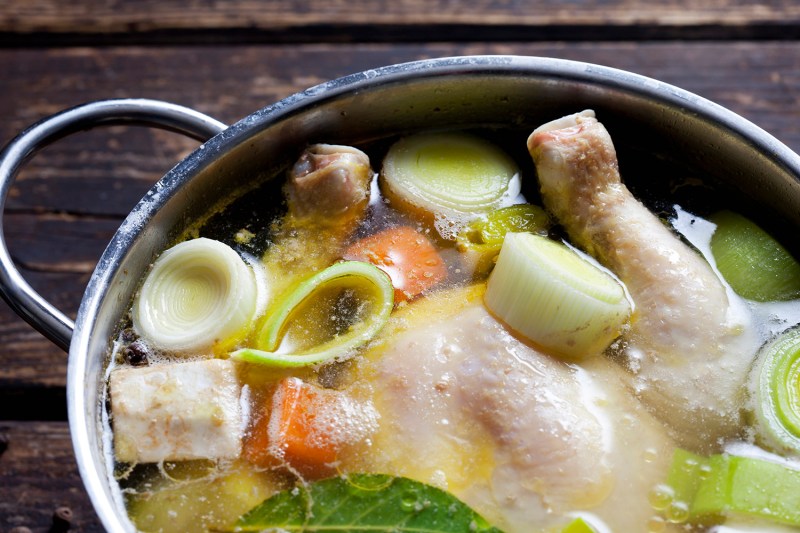
Whatever you do, do not throw away the leftover carcass or any bones left after carving. Now is the time to turn trash into treasure. Throw those bones into a large stockpot with a few chopped carrots, celery, and onions along with some parsley stems, a head of garlic, black peppercorns, and a bay leaf or two with 5-6 quarts of cold water. Bring it to a boil, reduce to a simmer, and let it roll for a couple of hours. You’ll be left with the liquid gold that you can freeze to use later for soup or sauces.
Editors' Recommendations
- Learn how to make perfect grill marks every time
- 5-ingredient recipes: You’ll love these simple chicken meals
- Exclusive: this easy dill pickle pimento cheese dip recipe is perfect for spring snacking
- Corned beef and cabbage: Learn how to make this St. Patrick’s Day classic
- How to make your own cold brew coffee at home (no, it isn’t just iced coffee)


