
How to clean headlights using 2 popular methods

Don't neglect your headlights? Here's how to clean them in a snap

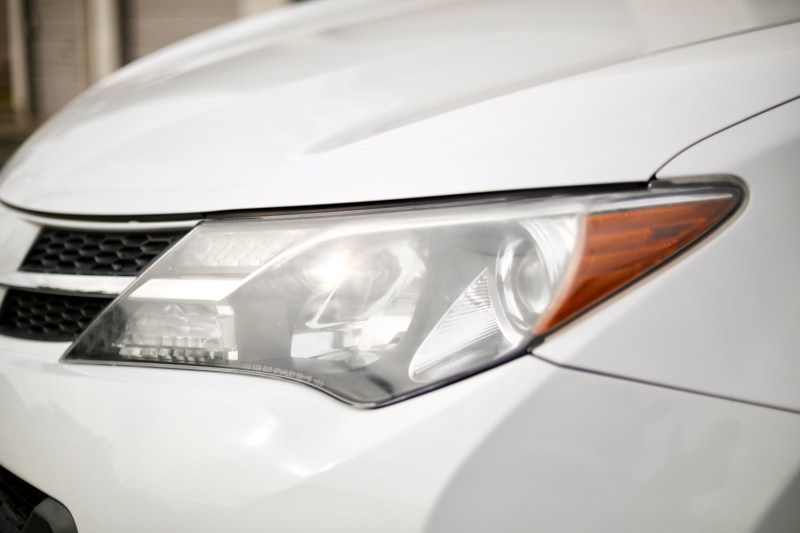
Over time, headlights will pick up every day dirt and grim just like the rest of your car. It's important not to ignore the headlights when cleaning your car though. Just like the rest of your vehicle, headlights need some TLC. Dirty headlights won't shine properly at night or in the daytime. Before giving them a scrub though, take a few minutes to learn how to clean headlights the right way.

Difficulty

Easy

What You Need

  • Soft cloth or a rag

  • Car soap

  • Water

  • Baking soda

  • Vinegar

  • 3/4 inch painter's tape (thicker is fine too)

  • Toothpaste without crystals or particles

  • Windex

  • Container with lid

Giving headlights a simple wash with regular car soap or even Windex usually does the trick on that ugly dirt coating. Over time though, even the most meticulously maintained headlights will become foggy. Foggy headlights are just a symptom of the natural aging of your vehicle and not something to worry about. It is something to take care of and a relatively simple thing. You can get the DIY job done with things you probably already have at home. It may sound surprising, but regular household items like toothpaste, vinegar, and baking soda can work wonders on foggy headlights. Of course, there are all-in-one kits you can buy that can get the job done too, but all this task really requires is some elbow grease. So, let's learn how to clean foggy headlights.

White Toyota RAV4 close up of front end in driveway.
Miles Branman/The Manual

How to clean headlights with toothpaste

Cleaning your headlights with toothpaste is by far the easiest and quickest way to clean foggy headlights. It's an effective method for cleaning foggy headlights and isn't abrasive. It also doesn't take long.

Step 1: The first step in cleaning your foggy headlights with toothpaste is to wash them and the surrounding surfaces with soap and water. Cleaning any exterior grime from the housings will avoid scratching the lenses and shows off your hard work when the project is complete.

Foggy headlight on Toyota RAV4 from driver's side.
Miles Branman/The Manual

Step 2: Once the headlights have been thoroughly washed, allow the cleaned portion to dry completely. You don't want moisture to make its way into the headlights.

Man putting purple tape around a Toyota RAV4's front headlight.
Miles Branman/The Manual

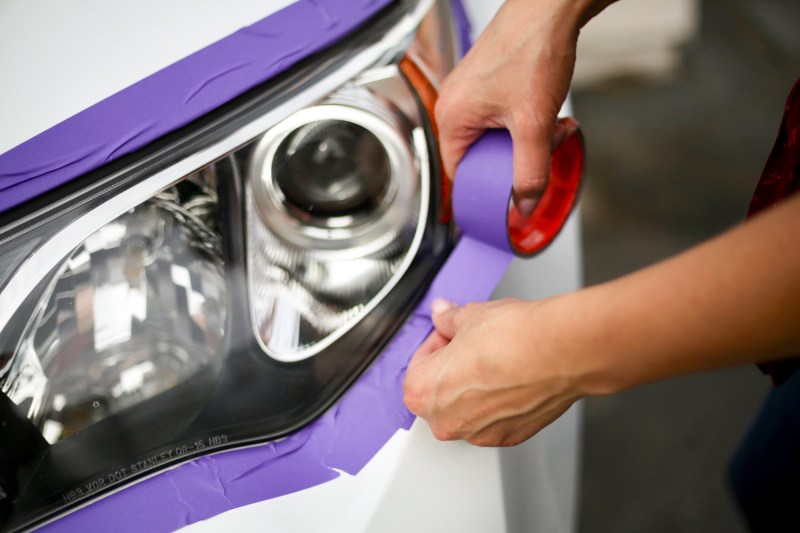
Step 3: Next, it’s time to bust out that painter’s tape. Avoid using strong adhesive tape so you don’t damage your car’s paint. Make a perimeter of tape around each headlight, leaving all of the actual housing of the headlights exposed. Don't use a strong adhesive tape to avoid damaging the car's paint. You can also tape off your turn signals or leave them exposed for cleaning too. Turn signals don't typically get foggy like headlights do.

Applying toothpaste onto a towel in front of a white Toyota RAV4's headlight.
Miles Branman/The Manual

Step 4: Once you've taped around each headlight's perimeter, it's time for the toothpaste. The toothpaste method is the easiest and inexpensive. It's also simple. Apply some toothpaste to a soft cloth or a clean rag. Then, spread using circular motions, covering the entire headlight. Be sure to use a plain toothpaste such as Tom's or Arm & Hammer. Anything with flavor crystals or other particles may scratch the headlights.

Wiping toothpaste off a front headlight on Toyota RAV4.
Miles Branman/The Manual

Step 5: The final step in cleaning your foggy headlights with toothpaste is to rinse. Rinse the housing with water, dry it with a towel, and crack open a beer (cuz you’re done). No seriously, it’s that easy. Toothpaste is slightly abrasive, so applying it to your headlights scrapes away the crud while filling in any scratches. Why do you think five out of five dentists recommend using the stuff to fight plaque?

baking soda and vinegar for cleaning headlights

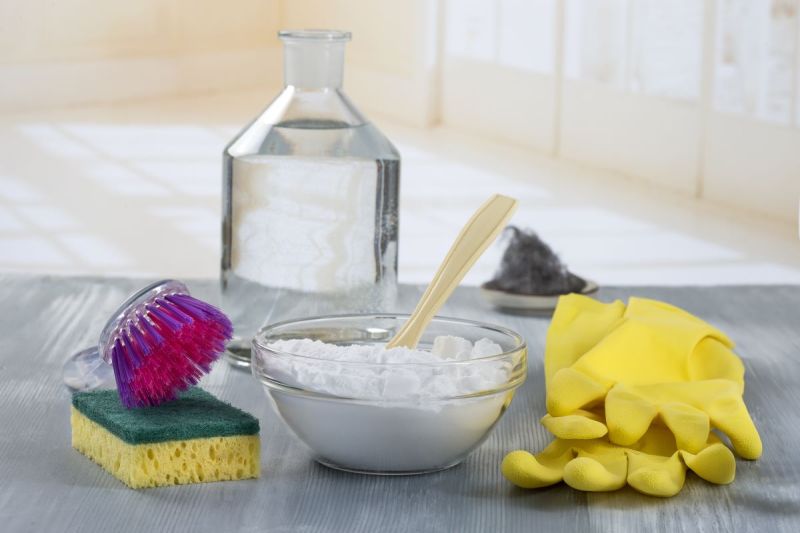
How to clean headlights with baking soda and vinegar

Another popular headlight cleaning method involves two common household things: baking soda and vinegar. This method is a great pick for extremely foggy headlights. The baking soda and vinegar method is also environmentally friendly and cheap.

Step 1: To get started, wash each headlight carefully with car soap and water.

washing headlights
Brad Starkey/Unsplash

Step 2: Next, allow the headlights to air dry completely.

Step 3: Using a clean container, mix together two parts white distilled vinegar and one part baking soda.

Step 4: Cover the container and shake to combine. You can also stir the mixture.

Step 5: Once the mixture is combined, you're ready to start cleaning. Dip in a clean cloth or rag. Then, begin rubbing the baking soda and vinegar mixture on the entire headlight. If necessary, add more of the mixture to ensure a thorough cleaning.

Step 6: When the baking soda and vinegar mixture has been applied to both headlights, rinse completely with water.

Step 7: If need be, you may repeat the steps, making sure to rinse after each application of the baking soda and vinegar mixture.

Front end close up of 2023 Bentley Bentayga EWB headlights and new vertical grille.
Joel Patel/The Manual

What to buy to clean headlights

If using toothpaste seems out there and baking soda and vinegar reminds you of middle school science, you can always pay for a kit. You’ll still need to get your hands dirty (or clean?) with an all-in-one setup, and the results will be about the same as these two popular DIY headlight cleaning methods. Headlight cleaning kits aren't expensive and are widely available.

Why do car headlights turn foggy? Headlights become foggy over time because of the chemical reaction that takes place between exposed plastic and the sun’s ultraviolet rays. Accumulated dirt within the housing can also play a role in turning your headlights from crystal clear to a yellowish hue. Cleaning your car's foggy headlights can transform the overall appearance of your car.

It can go from looking like car that's in need of attention to a show vehicle. More seriously, foggy headlights can drastically impair the effectiveness of your car’s actual bulbs. As more fog builds up, it becomes more difficult to see, especially at night. In other words, foggy headlights should be addressed as soon as possible. It's actually an essential part of your car maintenance regimen.

Editors' Recommendations

Dawn Miller
Dawn Miller began her professional life as an elementary school teacher before returning to her first love, writing. In…
Watch: Simulations of cars crashing at different speeds show when things get deadly
Forget about the racing, BeamNG.drive’s crash simulator is its true calling card
Two cars crashing into one another from above in BeamNG.Drive PC game.

There’s no shortage of racing games available today, especially if you’re lucky enough to have a gaming PC. While most people got addicted to racing games with options like Gran Turismo, Colin McRae Rally, Sega Rally Championship, or Need for Speed Underground, there are so many amazing racing games to choose from today that picking an option can be difficult. Forza Horizon is for people that hate feeling confined, iRacing is for people that feel like they should be racers, Assetto Corsa Competizione is for lovers of GT Racing, F1 2022 unleashes your inner F1 driver, and Mario Kart 8 Deluxe lets you be a kid again. The list is practically endless.
One game that you might not have heard of, but should totally check out is BeamNG.drive. While it’s fun to load up F1 2022 and attempt to do some serious driving, BeamNG.drive is more about having fun. You see, while BeamNG.drive has serious drive modes like time trials and challenges, they’re usually something odd like complete a truck delivery. And if that doesn’t work for you, the game offers and endless list of things to do with racetracks, off-road maps, and a dizzying number of driving environments. But the real thing that sets BeamNG.drive apart is its excellent crash physics.
Damage to Сars at Different Speeds (100, 200, 400 km/h) - Beamng drive
In addition to offering a wide range of cars, modes, and driving environments, BeamNG.drive has some of the most realistic physics of any driving game currently available. The makers claim that the game uses “an incredibly accurate damage model” on its Steam page and anyone that’s watched a thorough video of BeamNG.drive knows that the game’s crash physics are amazing. Go to YouTube, type in BeamNG crash, and you’ll get thousands of videos of cars crashing into one another, bollards, trees, rocks, walls, guardrails, lightsabers, you name it. There are serious an endless number of things to do and crash into.
The modding community has had its way with the game, allowing gamers to crash cars that look pretty close to real-life vehicles. We’re particularly fond of watching cars crash at different speeds. In the video above, WreckStation takes a few different vehicles – a sporty sedan, a minivan, a supercar, and a classic taxi – and crashes them into things from 100 to 400 kph (62 to 248 mph). The crashes start by hitting the side of another car, then the front, then the rear, and then moves into a hitting a dummy, and finally a bollard.
BMW X7 crashes at different speeds in BeamNG Drive
As one would expect, the crash at 62 mph is severe. The vehicles, at least in the front crash simulation, have crushed hoods and bumpers that are now located in the engine bay. Pushing the speed up to 124 mph increases the amount of damage by a wide margin. This is when the doors crumple, the hoods fly off, and the cars look unrecognizable. At 248 mph, the vehicles that crash into one another almost look like they’ve been joined together. The entire front ends of the cars disintegrate and the bodies fly down the road, joined together in a strange dance. It’s entertaining, scary, and glorious. And it’s just one of the many, many videos out there.
Of course, BeamNG.drive isn’t perfectly accurate. To see how real-life cars actually perform in realistic crash tests, you’ll want to watch videos from the IIHS. They’re not as entertaining and are far scarier, but if you want to see how physics works in real life, that’s the place where you should go to never want to drive again. Us? We’ll be scrolling the web in search of more BeamNG.drive crash montages.

Read more
How often do you change the engine’s air filter? (And how to do it in 5 minutes)
One of your vehicle's most essential maintenance tasks is the cheapest and easiest to tackle yourself
Man working under the hood on a vehicle engine.

Changing your car's engine air filter is critical. But before you start poking at things under the hood, it's important to understand that your car actually has two air filters: A cabin air filter and an engine air filter (a.k.a. “vehicle air filter”). The cabin air filter ensures that passengers have clean air to breathe. This is an especially important component for city dwellers or anyone who lives in an area with poor air quality. The engine air filter, on the other hand, keeps the air your engine “breathes” clean and free of dirt, dust, and other particles — all of which can affect how efficiently your car runs. A dirty air filter can result in ignition problems, lower gas mileage, and, if neglected over the long-term, shortened engine life.

Read more
How to check brake fluid in your car and refill if needed
Don't pay a mechanic for low brake fluid! Learn how to check brake fluid yourself
Closeup of a vehicle engine.

Modern vehicles are more complicated than those of decades past. Still, most manufacturers make it easy for owners to perform routine maintenance tasks on their own. If you like keeping your car clean and ready to roll, you’re probably motivated enough to tackle the small things on your own without taking it to a mechanic for everything. Things like changing your oil and replacing your vehicle’s air filters can be done with little automotive knowledge and few, if any, tools. The same can be said for low brake fluid. Checking brake fluid isn't complicated. All you really need is two hands and around 10 minutes.

Read more